

User Management
Integr8 lets you add multiple users to your account, each with a role that defines what they can see and edit. Create roles before adding users.
Create a role
Section titled “Create a role”Roles define the permission level for each section of the platform. You must create at least one role before inviting users.
- Go to Organization > User Management.
- Select the Roles tab.
- Click + Create.
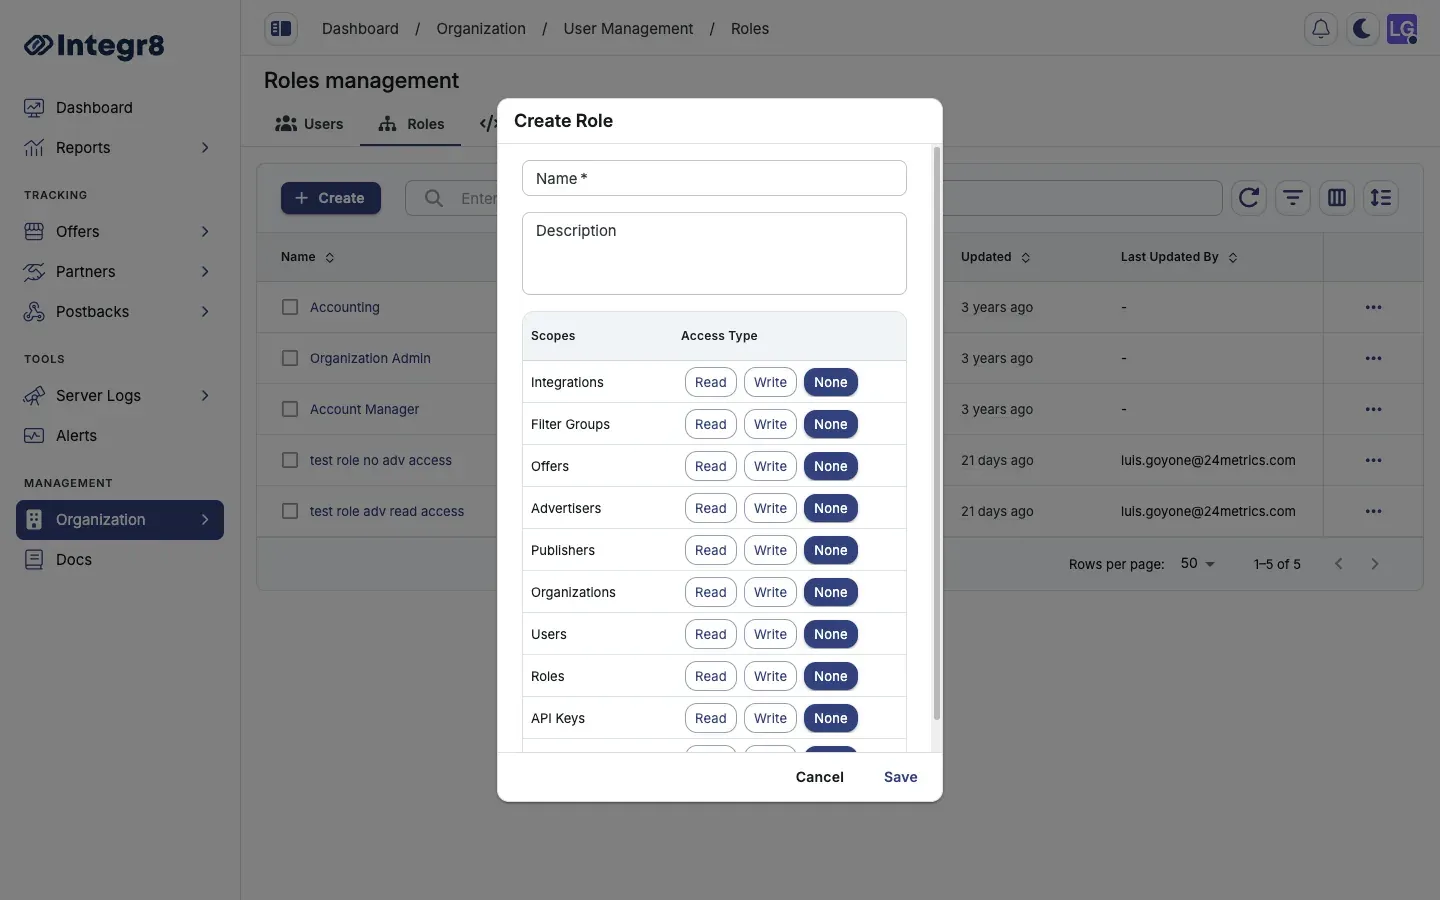
- In the Create Role dialog, enter a Name (e.g., “Campaign Manager”) and optional Description.
- For each Scope (Offers, Advertisers, Publishers, Users, Roles, API Keys, and more), set the Access Type:
- None — the user cannot view or edit this section
- Read — the user can view but not edit
- Write — the user can view and edit
- Click Save.
Invite a user
Section titled “Invite a user”- Go to Organization > User Management.
- Select the Users tab.
- Click + Create.
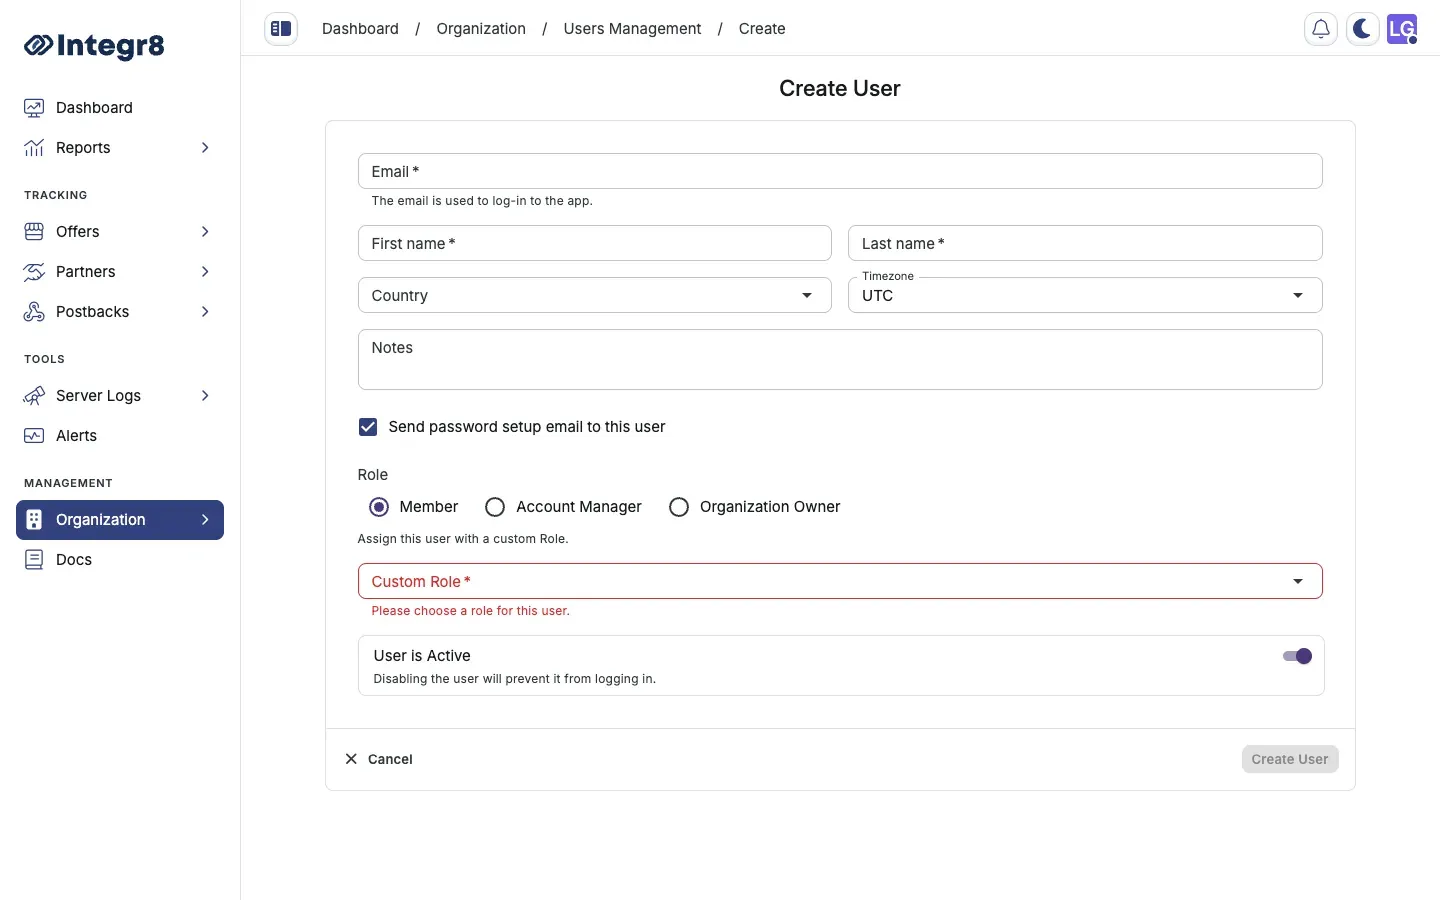
- Fill in the user’s Email, First name, and Last name (Country, Timezone, and Notes are optional).
- Keep Send password setup email to this user checked so they receive an invite.
- Choose the base Role (Member, Account Manager, or Organization Owner) and select the Custom Role you created.
- Click Create User. The user receives an email invitation to set their password.
Users can only be assigned one role at a time. To change a user’s role, edit the user and select a different role.
Edit or remove a user
Section titled “Edit or remove a user”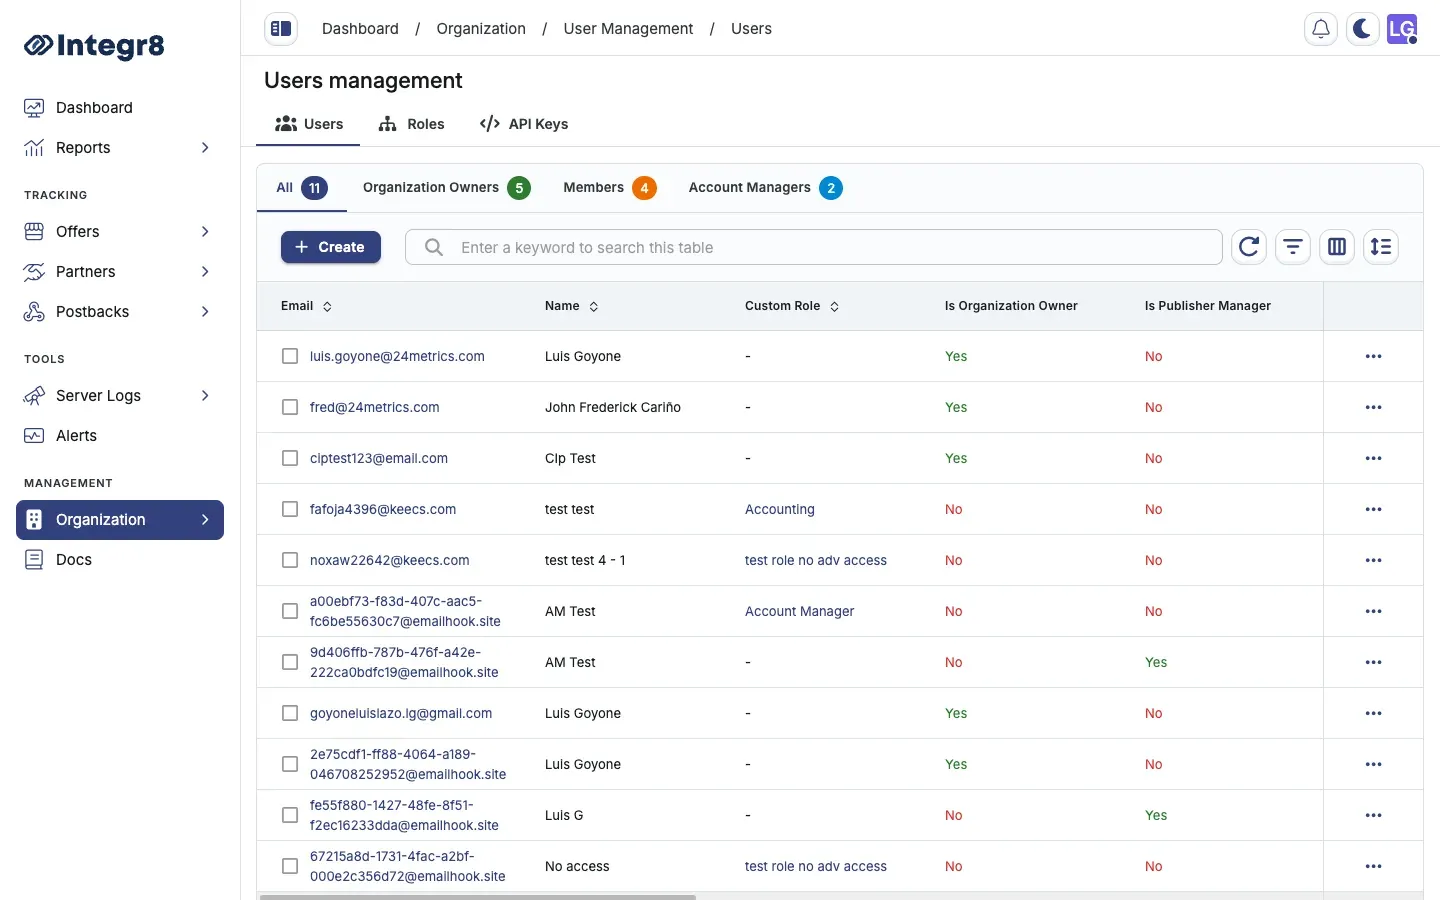
- Go to Organization > User Management.
- Select the Users tab.
- Find the user in the list and click their name.
- Select the Settings tab.
- Update their details or role, then click Save.
- To remove a user, go to Danger Zone, click Delete User and confirm.
Permission reference
Section titled “Permission reference”| Permission | Can view | Can edit |
|---|---|---|
| None | No | No |
| Read | Yes | No |
| Write | Yes | Yes |
Permissions apply section by section. A user can have Read access to Reports and Write access to Campaigns simultaneously.