

Create an offer
An offer is the core unit of a campaign in Integr8. It defines the product being promoted, the tracking link structure, and the payout rules for publishers.
Before you begin
Section titled “Before you begin”- Create the advertiser the offer belongs to. See Create an advertiser.
- Have the destination URL ready, including the macro your advertiser uses to receive the click ID.
Quick start
Section titled “Quick start”The fastest path to a working offer. Only the General section is required — every other section keeps sensible defaults, so you can create the offer and refine it later.
- Go to Offers > Offers Management and click Create.
- In General, enter a Name, pick the Advertiser, and set the Redirect URL (include
{transaction_id}). - (Optional) In Conversions, set the Currency, Revenue, and Payout.
- (Optional) In Publishers, choose the visibility:
Public,Private, orPublic + Requires Approval. - Click Create Offer.
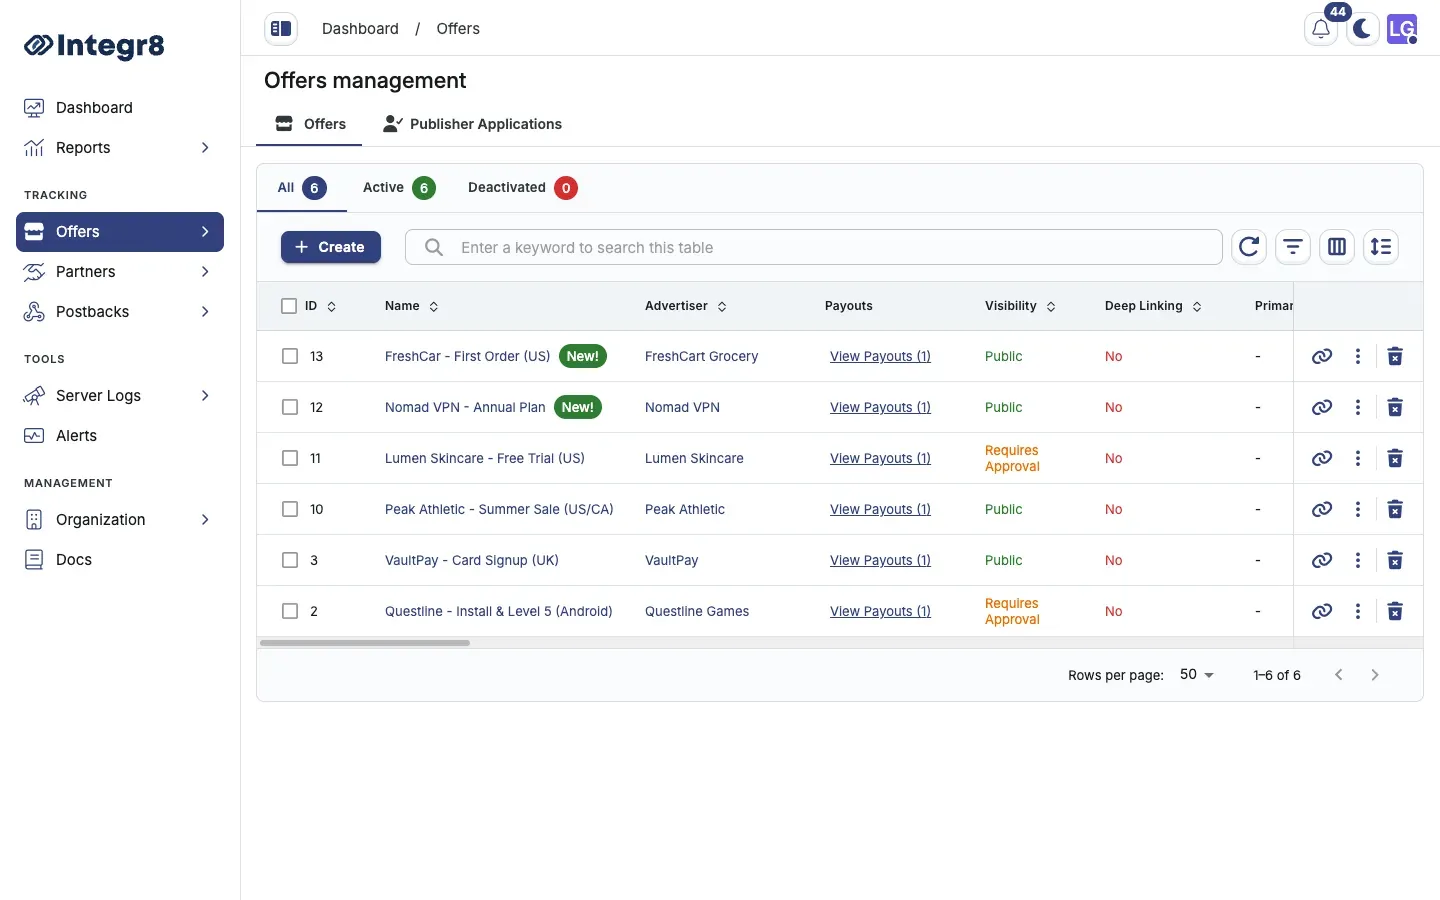
Always include {transaction_id} in the redirect URL. The advertiser’s system passes this value back on conversion, and Integr8 uses it to match the click to the conversion.
The rest of this page is a reference for every section of the Create Offer form. You can fill the sections in any order using the left-hand navigation.
General (required)
Section titled “General (required)”This is the only section with required fields.
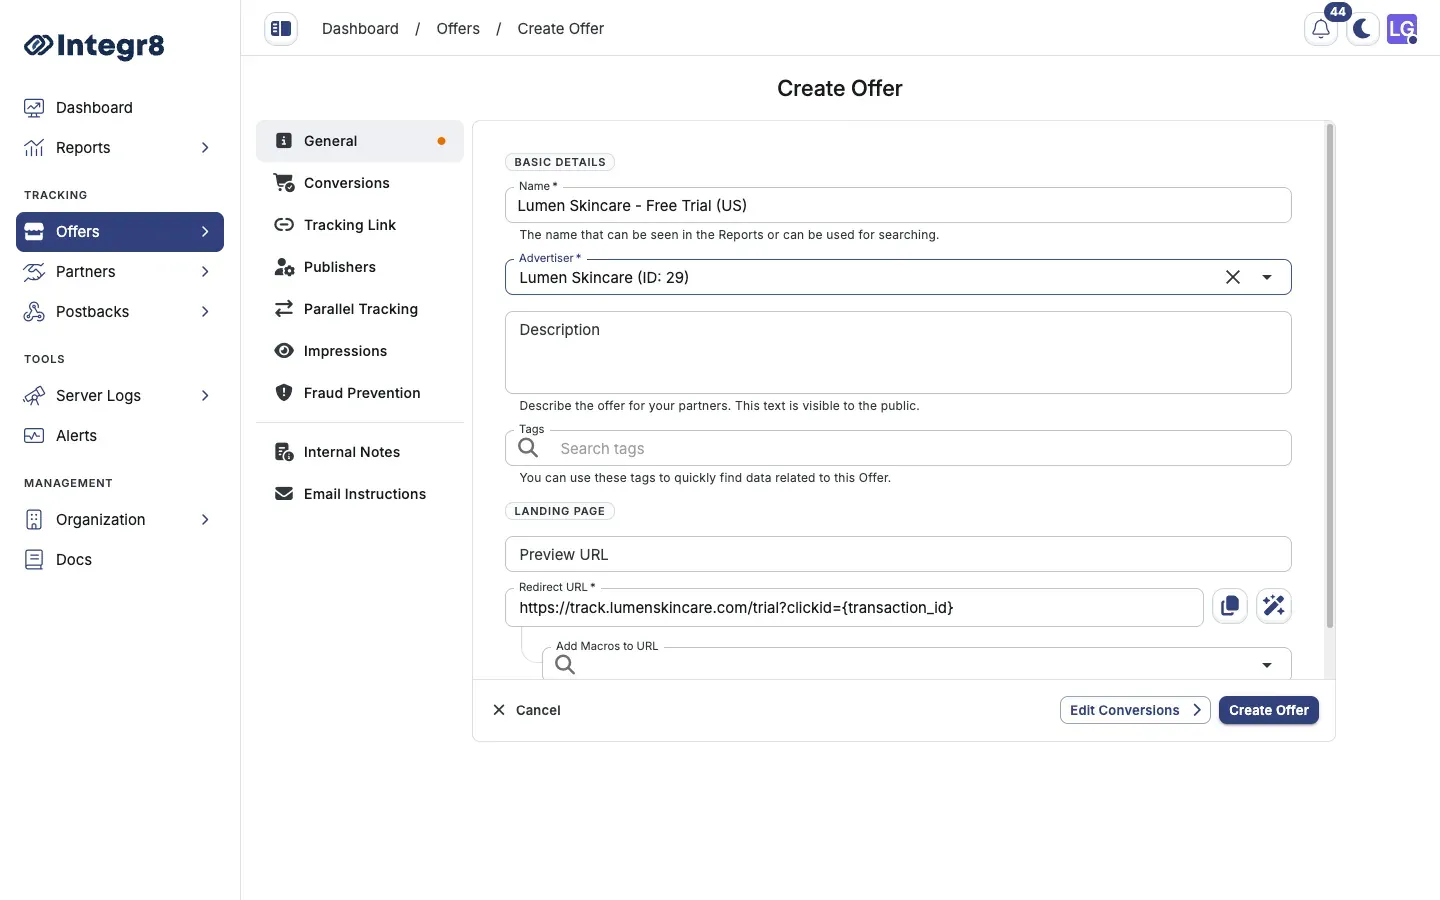
Basic details
Section titled “Basic details”| Field | Required | Notes |
|---|---|---|
| Name | Yes | Internal label used in reports and search |
| Advertiser | Yes | Select from the dropdown |
| Description | No | Visible to the public. Describe the offer for your partners |
| Tags | No | Filter and group offers in tables and reports |
Landing page
Section titled “Landing page”| Field | Required | Notes |
|---|---|---|
| Preview URL | No | Non-tracked preview of the landing page |
| Redirect URL | Yes | Tracked destination. Must include {transaction_id} |
Example redirect URL:
https://example.com/lp?clickid={transaction_id}Add macros to the redirect URL
Section titled “Add macros to the redirect URL”Use the Add Macros to URL picker below the Redirect URL field to insert Integr8 macros into the destination URL, so the advertiser receives the click ID and any other values you pass. Map the advertiser’s click ID parameter to {transaction_id}.
| Integr8 macro | Description |
|---|---|
{transaction_id} |
Unique click ID |
{publisher} |
Integr8 publisher ID |
{offer} |
Integr8 offer ID |
{sub_id} |
Sub-publisher ID from the tracking link |
See the picker for the full list of available macros. After saving, use the tracking link generator to verify substitution before going live.
Conversions (optional)
Section titled “Conversions (optional)”Set the default conversion revenue and payout for this offer. You can add more events later from the offer’s Revenue & Payout tab.
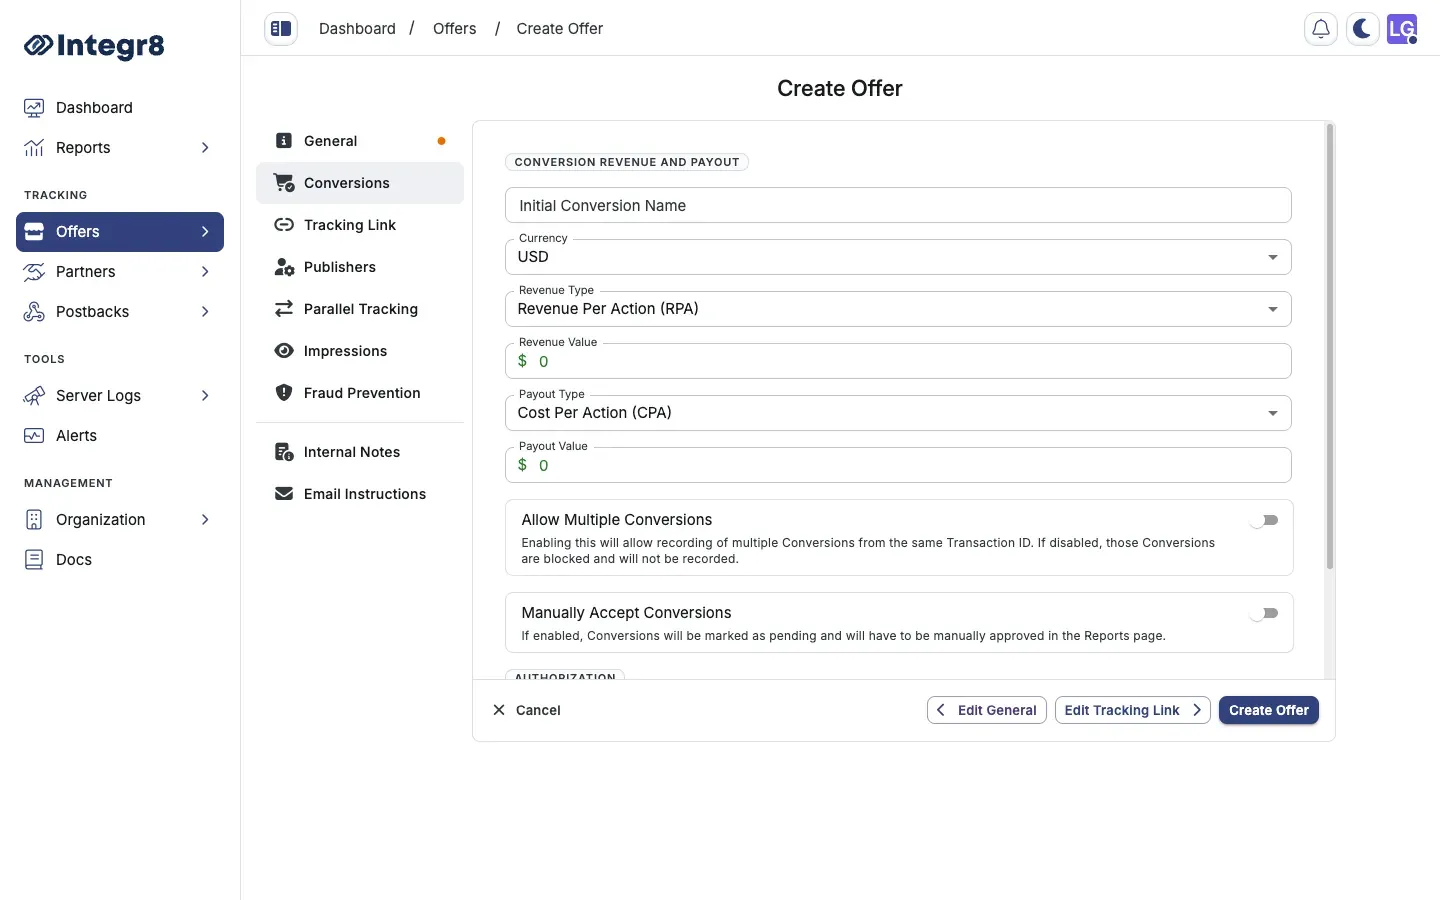
| Field | Required | Notes |
|---|---|---|
| Initial Conversion Name | No | Defaults to Conversion |
| Currency | Yes | Offer-level currency |
| Revenue Type | Yes | RPA, RPS, RPC, RPM, or RPAxRPS |
| Revenue Value | Depends on type | Fixed amount for RPA, RPC, RPM. Percent for RPS and RPAxRPS |
| Payout Type | Yes | CPA, CPS, CPC, CPM, CPAxCPS, or PRV |
| Payout Value | Depends on type | Fixed amount or percent based on payout type |
| Allow Multiple Conversions | No | Record more than one conversion per transaction_id. If disabled, extra conversions are blocked |
| Manually Accept Conversions | No | Mark conversions as pending until you approve them in Reports |
Revenue types describe how the advertiser pays you. Payout types describe how you pay publishers. They can differ.
Tracking Link (optional)
Section titled “Tracking Link (optional)”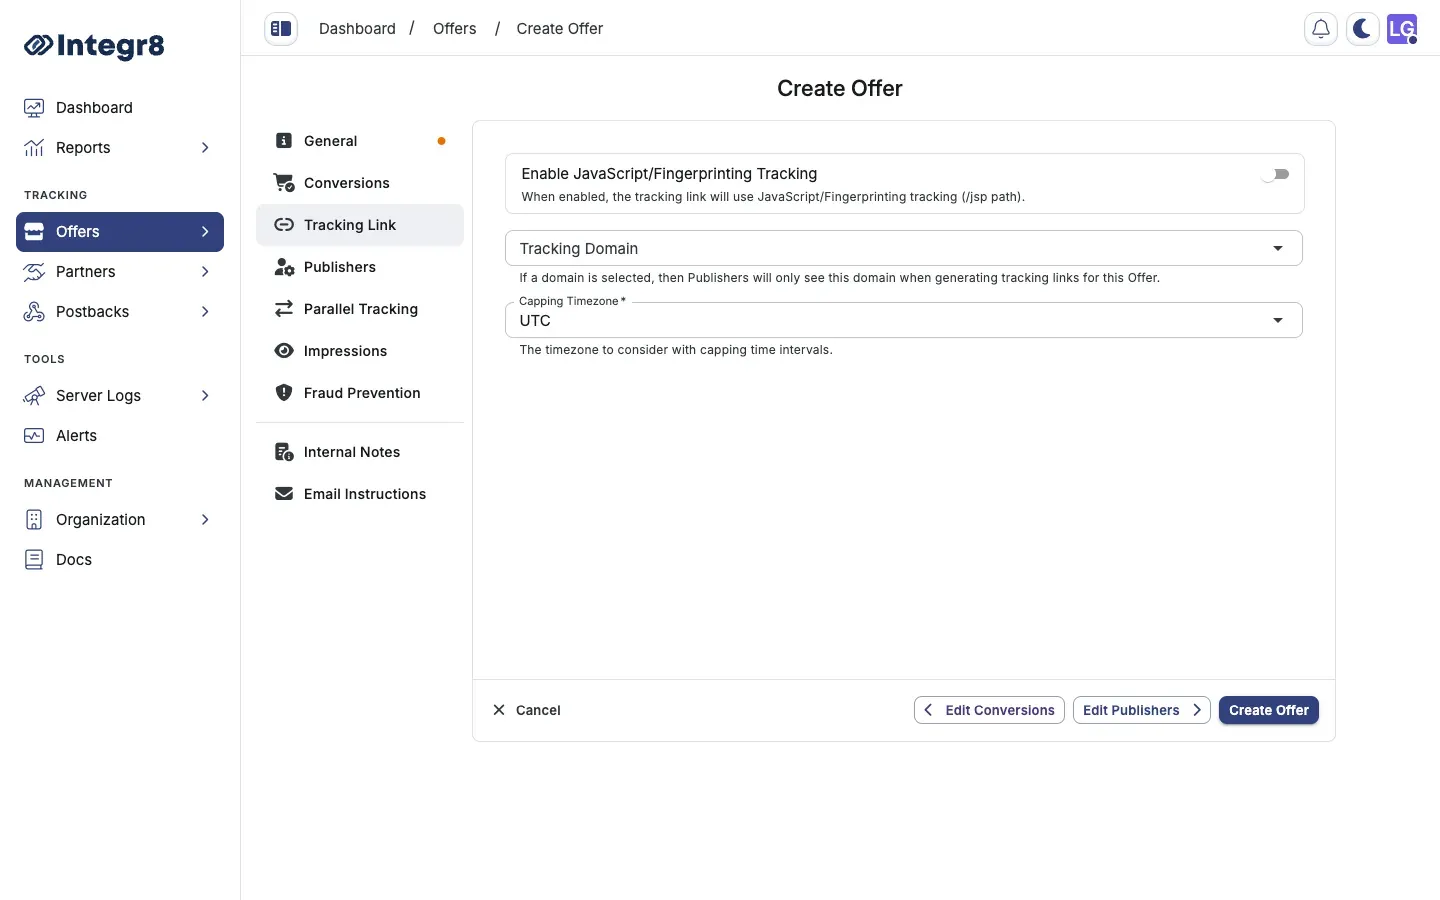
| Field | Required | Notes |
|---|---|---|
| Enable JavaScript/Fingerprinting Tracking | No | Uses the /jsp path on generated links |
| Tracking Domain | No | Restricts which domain publishers see in the link generator |
| Capping Timezone | Yes | Used for cap reset cycles on this offer |
Publishers (optional)
Section titled “Publishers (optional)”Control which publishers can use the offer and what they must accept.
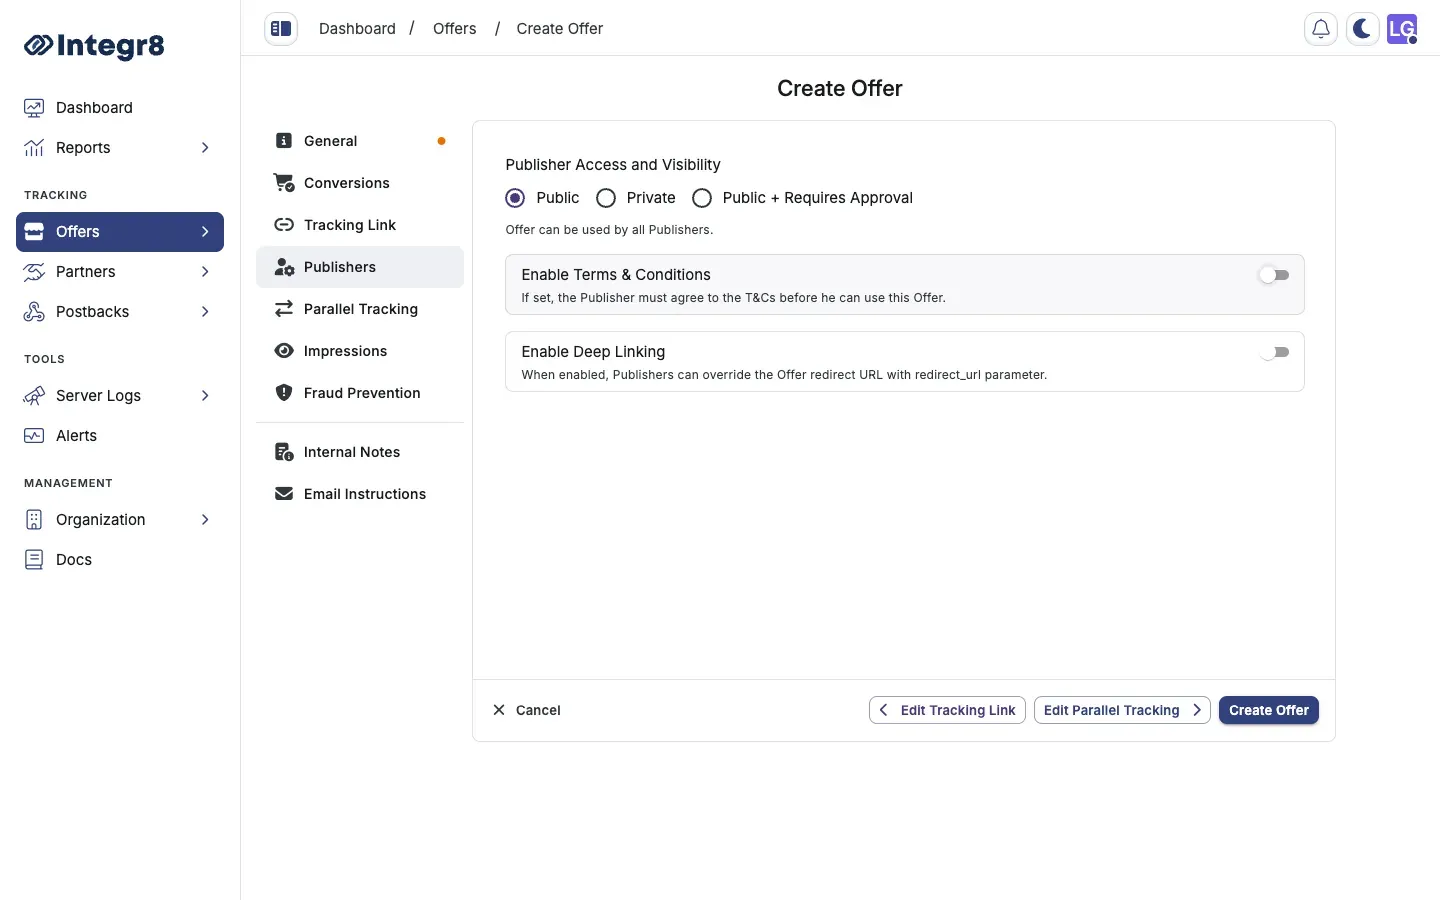
| Field | Notes |
|---|---|
| Publisher Access and Visibility | Public, Private, or Public + Requires Approval |
| Enable Terms & Conditions | Optional agreement publishers must accept before using the offer |
| Enable Deep Linking | Lets publishers override the redirect URL with a redirect_url parameter |
Parallel Tracking (optional)
Section titled “Parallel Tracking (optional)”| Field | Notes |
|---|---|
| Enable Click Parallel Tracking | Fire a server-side call to a Click Parallel Tracking URL on each click |
Impressions (optional)
Section titled “Impressions (optional)”| Field | Notes |
|---|---|
| Enabled View Through Impression Tracking | Use impressions as the first option for attributed conversions |
| Enable Impression Forwarding | Fire a server-side call to an impression forwarding URL on each impression |
Fraud Prevention (optional)
Section titled “Fraud Prevention (optional)”Choose the Click Fraud Prevention Strategy — what happens when a click is rejected by targeting or fraud rules:
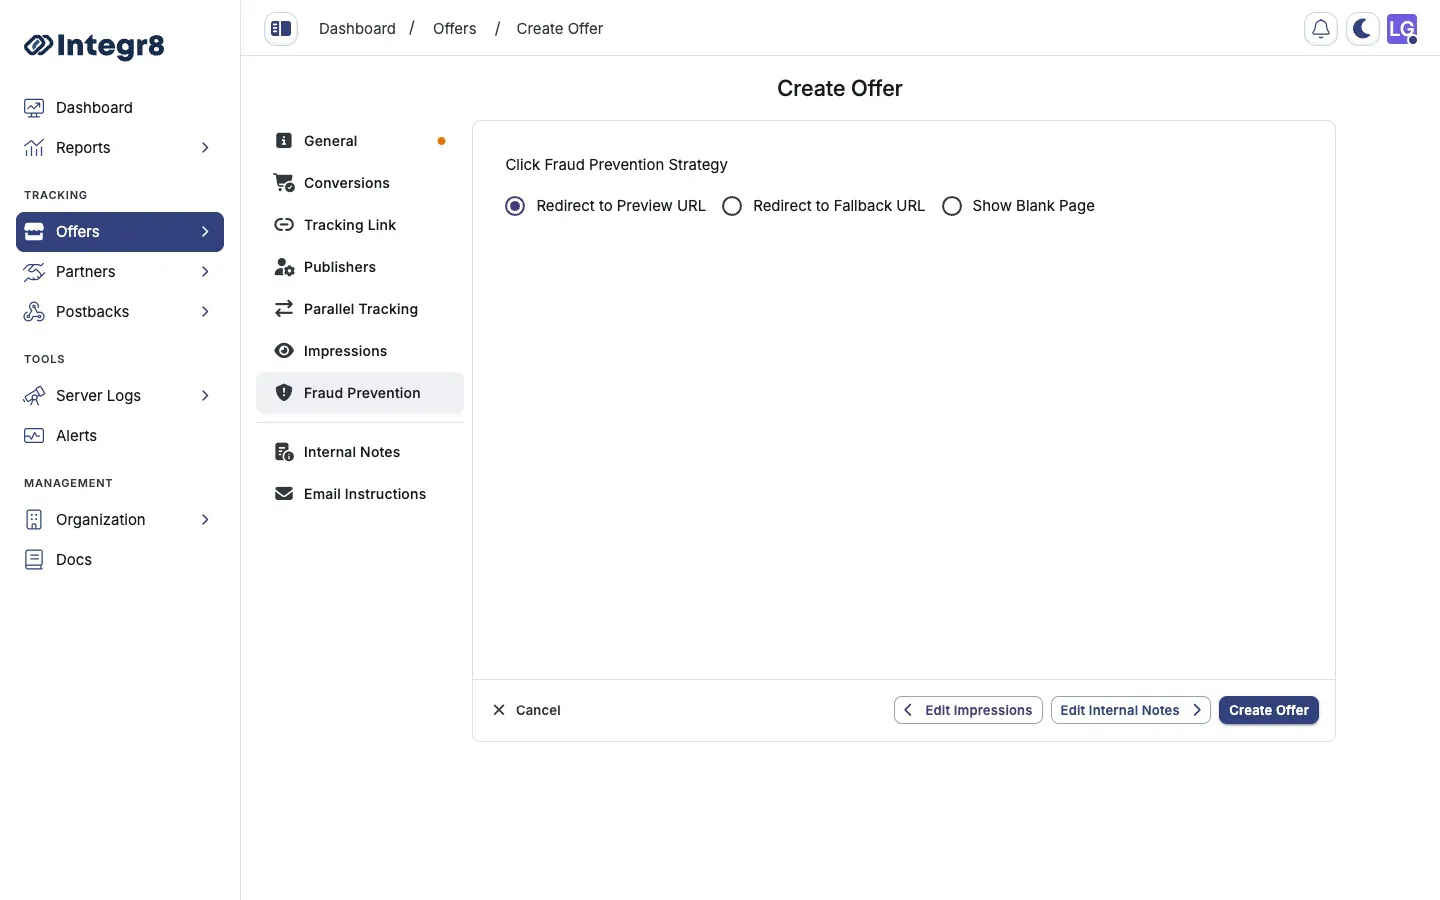
| Option | Behavior |
|---|---|
| Redirect to Preview URL | Send rejected clicks to the preview URL |
| Redirect to Fallback URL | Send rejected clicks to a separate fallback URL |
| Show Blank Page | Block the click with a blank page |
Internal Notes (optional)
Section titled “Internal Notes (optional)”| Field | Notes |
|---|---|
| Internal Note | Not visible to publishers or advertisers |
| Restrictions | Visible to publishers |
Email Instructions (optional)
Section titled “Email Instructions (optional)”Optional From Lines and Subject Lines copy shown to publishers when you share offer details by email.
After creation
Section titled “After creation”The offer is created active by default — there is no separate status picker on the create flow. Open the offer to add more configuration from its detail tabs: Landing Page, Revenue & Payout, Targeting, Capping, and Fraud Detection.
Edit an existing offer
Section titled “Edit an existing offer”Open the offer from Offers > Offers Management. The Overview tab summarizes the offer, and each section has an edit (pencil) control. Use the tabs across the top to reach Landing Page, Revenue & Payout, Targeting, Capping, Fraud Detection, and Settings. The status is Active or Inactive — there is no Paused or Expired status.
Next steps
Section titled “Next steps”- Generate a tracking link for publishers.
- Configure revenue and payouts in more detail, including additional events.
- Set up conversion tracking so postbacks match clicks to conversions.
- Set offer caps to limit traffic or conversion volume.